Your shopping cart is empty!
This drive can be used for expansion cards, engraving machines, 3D printers.
A total of four bays can drive four A4988 stepper motor drives. Only two IO ports are required for the stepping motor on each side. In other words, six IO ports can handle three stepper motors. Very comfortable to use.
Example UNO module IO port connection:

IO The figure above
UNO expansion card
8: EN (step motor drive active, active low)
7: Z.DIR (Z-axis direction check)
6: Y.DIR (Y - partial direction check)
5: X.DIR (X-axis direction control)
4: Z.STEP (Z-axis step control)
3: Y.STEP (Y - step control)
2: X.STEP (X-axis step control)
/ / The following is a simple stepper motor control procedures,
# Define EN 8 / / stepper motor enable, active low
# Define X_DIR 5 / / x-axis stepper motor direction control
# Define Y_DIR 6 / / y-axis stepper motor direction control
# Define Z_DIR 7 / / z axis stepper motor direction control
# Define X_STP 2 / / x - step control
# Define Y_STP 3 / / y - axis step control
# Define Z_STP 4 / / z - axis step control
/ / Function: step. Function: to control the direction of the stepper motor, the number of stages.
/ / Parameters: dir direction control, dirPin corresponding stepper motor DIR pin, stepper pin corresponding stepper motor 'step' pim, step return value value step number.
Void step (boolean dir, byte dirPin, byte stepperPin, int steps)
{
DigitalWrite (dirPin, dir);
Delay (50);
For (int i = 0; i
DigitalWrite (stepperPin, HIGH);
DelayMicroseconds (800);
DigitalWrite (stepperPin, LOW);
DelayMicroseconds (800);
}
}
Void setup () {/ / The stepper motor used in the IO pin is set to output
PinMode (X_DIR, OUTPUT); PinMode (X_STP, OUTPUT);
PinMode (Y_DIR, OUTPUT); PinMode (Y_STP, OUTPUT);
PinMode (Z_DIR, OUTPUT); PinMode (Z_STP, OUTPUT);
PinMode (EN, OUTPUT);
DigitalWrite (EN, LOW);
}
Void loop () {
Step (false, X_DIR, X_STP, 200); / / X axis motor reverse 1 ring, the 200 step is a circle.
Step (false, Y_DIR, Y_STP, 200); / / Y axis motor reverse 1 ring, the 200 step is a circle.
Step (false, Z_DIR, Z_STP, 200); / / Z axis motor reverse 1 ring, the 200 step is a circle.
Delay (1000);
Step (true, X_DIR, X_STP, 200); / / X axis motor forward 1 laps, the 200 step is a circle.
Step (true, Y_DIR, Y_STP, 200); / / Y axis motor forward 1 laps, the 200 step is a circle.
Step (true, Z_DIR, Z_STP, 200); / / Z axis motor forward 1 laps, the 200 step is a circle.
Delay (1000);
}
Note: When installing module A4988, be careful not to install it in the opposite way. Step motor cable as follows:
If you want to change the direction, you can change the position of a group for example 2A, 2B, a group (red, green), 1A, 1B, a group (blue, yellow), 2B mutual exchange.
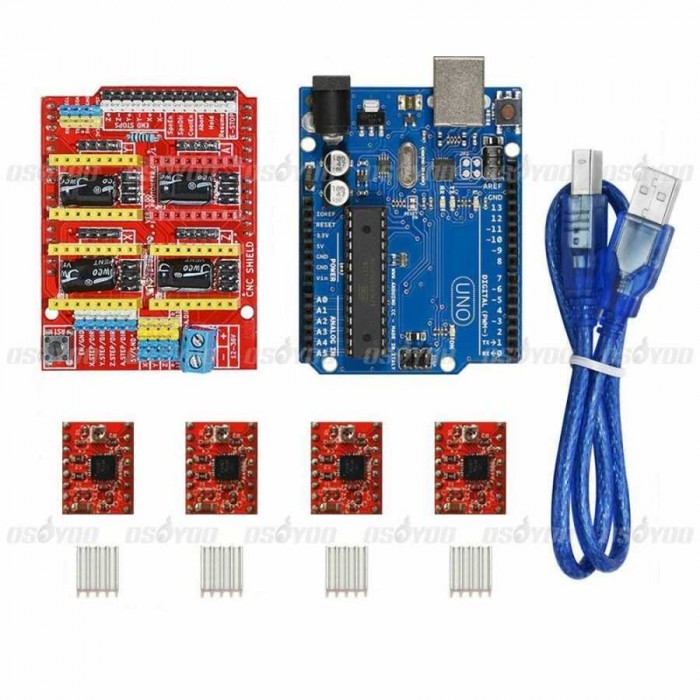
Package Included
1 x Shield V3 Engraving Machine Step Motor Driver Expansion Card
4 x A4988 Step Motor Driver
4 x Cooler